|
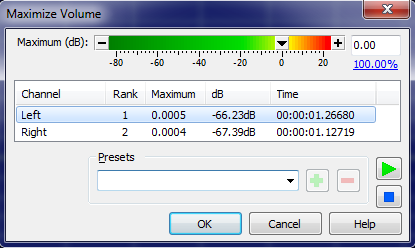
SSDS3 Stereo Bypass "Spaceship Edition" Install Guide This bypass op-amp board is designed as a more advanced and isolated audio mod for older revisions of the SSDS3 over my previous standard bypass board. Results when tested on the Super Grafx showed superb noise floor reduction:
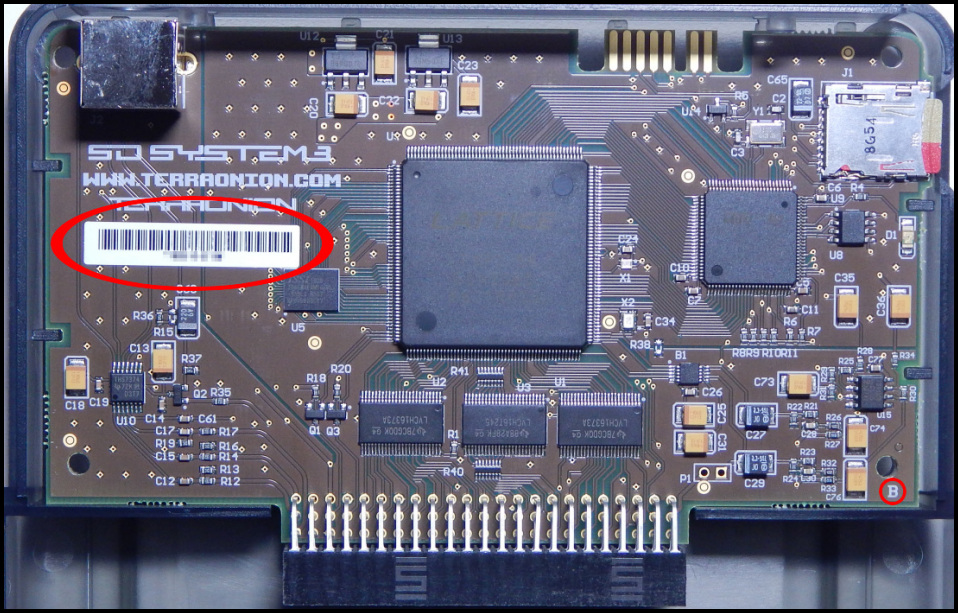
SSDS3 2019 "Rev B" Revision Notice: Please note which version of the SSDS3 board you have before ordering any mods for it! Starting in December of 2018, TerraOnion integrated both Voultar's video circuit mod and my audio circuit mod into the SSDS3 board itself. Below is a picture of this new revision. If you see a white sticker bard code as shown below and the revison letter "B" in the lower right-hand corner of the board (both circled in red), you do NOT need any mod work done on your SSDS3:
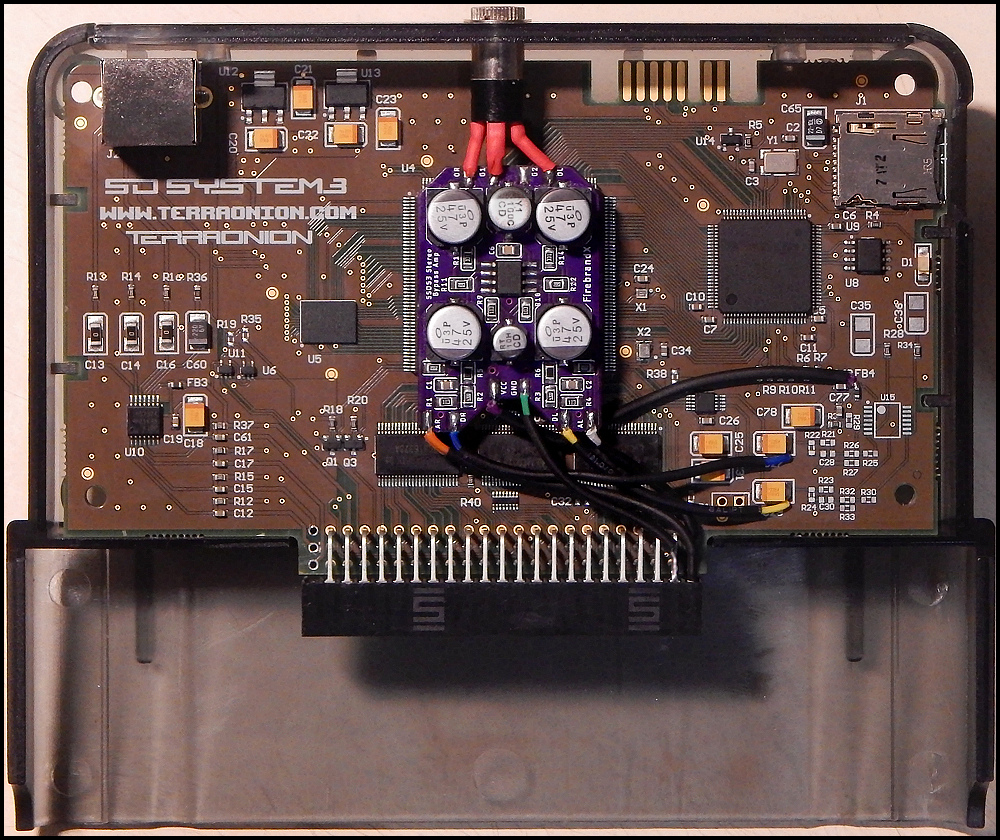
You can order the board plates from OSH Park (which also includes a Bill of Materials so you can select the parts for assembly from your favorite electronics supply dealer). I will no longer be making these boards as I need to move on to bigger and better projects: SSDS3 Stereo Bypass Amp Example Installation Guide: If you intend to use Voultar's FU-RGB board, I'd just stick to the standard installation that routes the lines back into the mini-DIN jack from the top pads of C35 and C36. For best possible results however, run the output lines straight from the mod board to a 3.5mm headphone jack drilled into the backplate and secured with a locking nut (as shown in the image below):
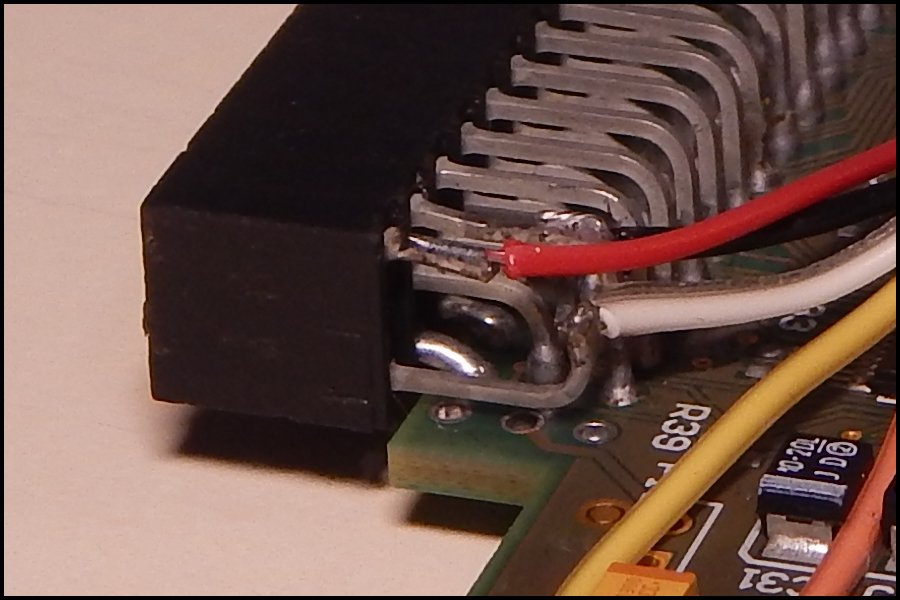
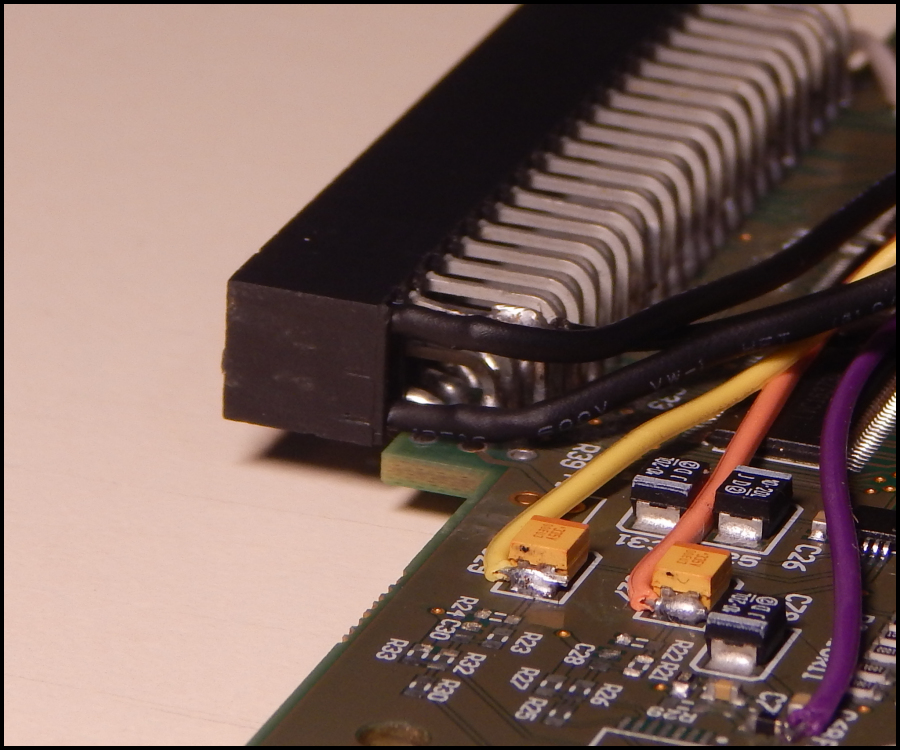
Take note parts removed from the pre-amp and op-amp stage and do the same. Choose your own method, though I personally use a hot air station (watch some videos on Youtube on how this is safely and correctly done). Then start wiring your digital left and right channels, the power channel, and ground channels into place (using the finished install pic above for reference). The analog audio channels are going to be a little more tricky. You'll need to desolder the analog audio pins from the SSDS3 board, or flush-cut them as close to the board as possible. These are the outside-most 3 pins on the top, middle, and bottom. Once all three pins are desoldered and/or flush-cut from the SSDS3 board, you can actually slip them out of the black interface socket. Please do so, and disregard the shortest pin of the lot. Next, your going to take the longest pin (that previously was used in the top pin socket), and flip it upside down to use in the bottom expansion hole nearest to the SSDS3 mainboard. This will cause the pin to bend upward instead of downward. Likewise, take the middle-side pin and insert it upside-down in the top expansion port slot. Lastly, solder wires to the pins and wire them up accordingly. Below is a quick and dirty example of this (though I had snipped the top-most pin's upward bend by this point anyway):
If you want a more professional and perhaps more safely isolated look, trim off the bend points of the pins and solder the wires directly to the remaining straight posts sticking out of the expansion holes. Then slip some shrink tubing over the entire work and use hot air to shrink it down tight:
If you need more specific details on wiring locations, below is the list of pad designations you need to solder to:
"OR" goes to top pad of "C35".
Note: The effectiveness of this moad board varies from one console revision to the next, with the Super Grafx giving nearly perfect results. Some consoles like the white PC Engine do not seem to respond well at all to audio circuit bypassing, and this appears to be the result of how power and ground are handled both by the SSDS3 and the console itself. These issues are beyond my scope and would likely require an extensive redesign of the SSDS3 itself.
Note 2: In-game triggering is officially not supported by Terra Onion and is a "use at your own risk" feature due to random crashes. This is because the traces used for in-game triggering are very sensitive to outside noise, and indeed this bypass audio board will inevitably cause a system crash if you have in-game triggering enabled. Getting around this would require experimentation with a fully externalized audio bypass board, where the wires immediately go out the right side of the board through a drilled hole in the plastic shell.
|