Neo Geo AES3-3 and 3-4 RGB bypass:
Floating around on the Internet is an RGB bypass mod for the AES3-5. The results looked fantastic, and I got to wondering if it were possible to apply the same basic approach, albeit with some changes I felt were needed. This mod is not fully accurate in terms of impedance and linearity, so this mod is not intended as a 'perfect' RGB bypass solution. However, the vast improvement over stock RGB from the encoder is a sight to behold! Results are beautiful and clean for both upscalers and CRTs alike!
Fair warning: I claim no responsibility for fried equipment if you mess up this mod, so make sure you're experienced in console modding/solder/desoldering before attempting such a modification.
Vetting the Process:
Before we begin, I'd like to point out I spoke at length about my 3-3/3-4 bypass mod with Ste Kulov of HD Retrovision on the subject of this mod's viability and quality. He gave my approach a thumbs up as being definitely viable because I made sure to attenuate the brightness. He says the only thing is it won't be entirely 'perfect' on technical and minor details, but that this is far outweighed by the improved visual clarity over the CXA's jail bars. Here are some snippets of his comments:
"Driving straight off the DAC should also be within spec, as long as your attenuation is correct.
The Neo Geo DAC output is a bunch of LS gates connected to each other so they are already sourcing/sinking into themselves. So using or not using a series cap would be negligible to performance. It's safer to use a cap, so I would still leave it in. 120uF minimum, but I would use 220uF. Can use 470uF if you want to go crazy. Can also leave out the capacitors like you have it now. They are not necessary. It's just for added protection in case some dum-dum heads hook things up wrong on the other end.
The trade off for simplicity in driving the video line directly off the DAC gates is huge. You still have impedance mismatches and non-linearity, but it's still better overall than the junk noise you get stock."
And with that, I'm betting the 3-5 bypass mod is subject to the same issues about impedance and non-linearity. However, the resulting picture looks so much better than stock encoder that as I said, the benefits far outweigh the negatives.
Step 1:
If your caps and resistors are stock, removes the ones marked with a red X:
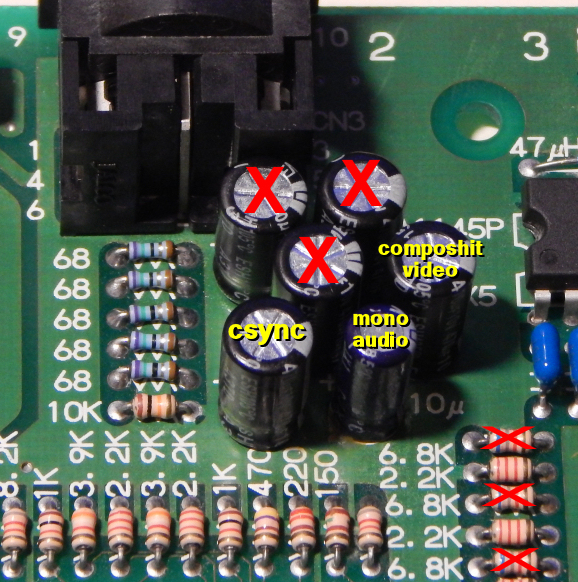
You may notice I had previously updated the caps and resistors to 470uf and 75 Ohm, ignore that UNLESS you want to upgrade your sync signal to proper spec in regards to the CXA1145 datasheet.
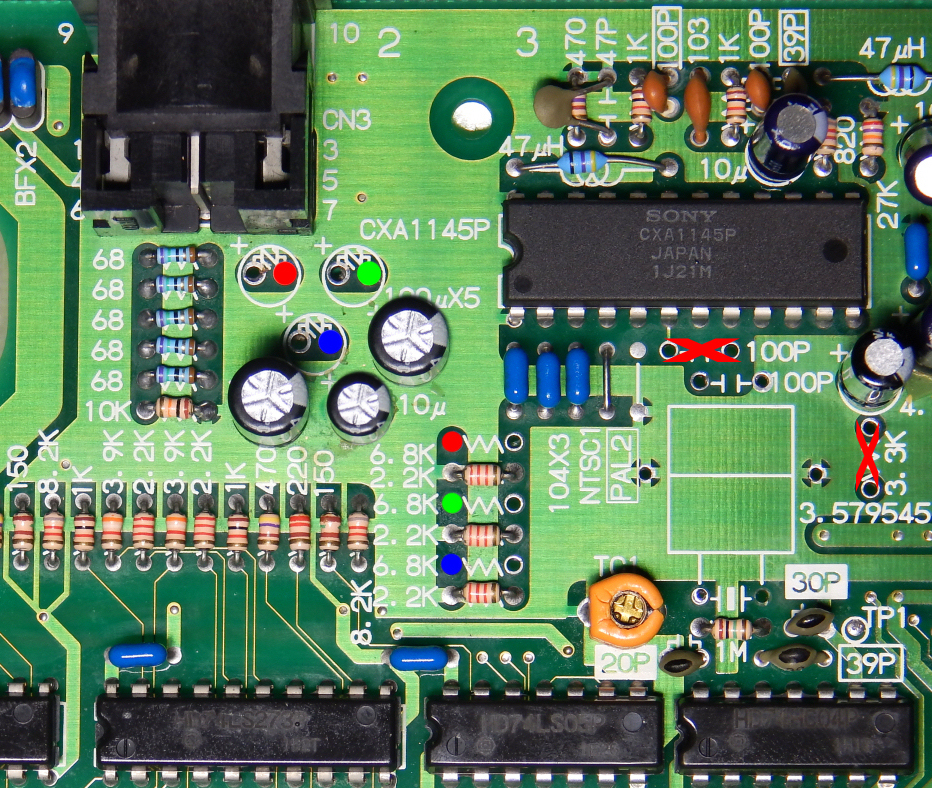
Step 2:
In the image below, you'll see the caps and resistors have been removed. Additionally on the right side, you'll see a couple of X marks. Removing those parts turns composhit video into a luma signal. So if your RGB cables use composhit video for sync, this will turn them into 'sync on luma', which is a cleaner sync method. However, the CXA1145P also drives csync as a separate line to pin 7 on the din out, and if you know your cables use pin 7 for csync, then you don't need to worry about removing those other parts. At any rate you'll see I've marked the RGB circles where our bypass wires will connect underneath:
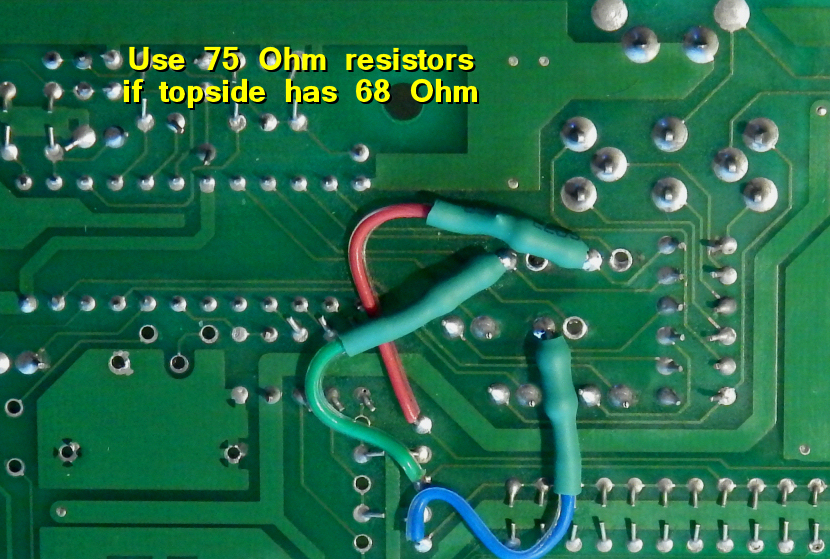
Step 3:
Simply solder the wires to the post shown in the image below, and make note of the resistor value needed. If you replaced the topside 68 Ohms resistors with 75 Ohm, then add 68 Ohm resistors to these wires and shrink-tube them. If your topside resistors are still stock 68 Ohms, then of course you add 75 Ohm resistors to these wires instead. The point is to reach 143 Ohm total resistance to properly attenuate the RGB lines.
*Note that this is based on the 3-3 revision of the AES. The 3-4 may or may not require raising or lowering the total resistance to dial in perfect RGB attenuation. One 3-4 owner reported they did not need to change the ratings I suggested.
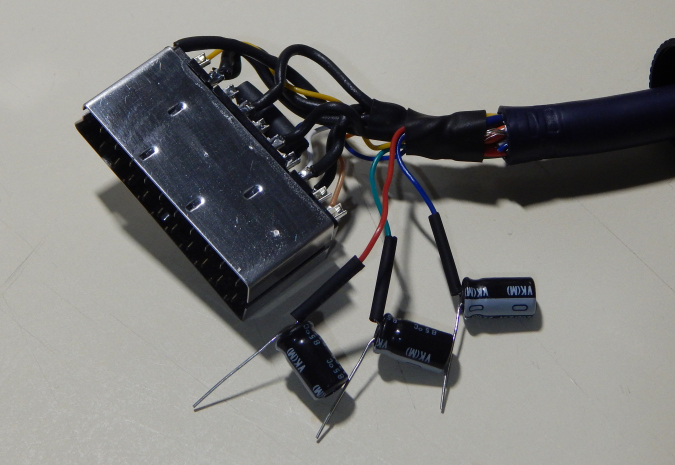
Step 4 (optional for safety):
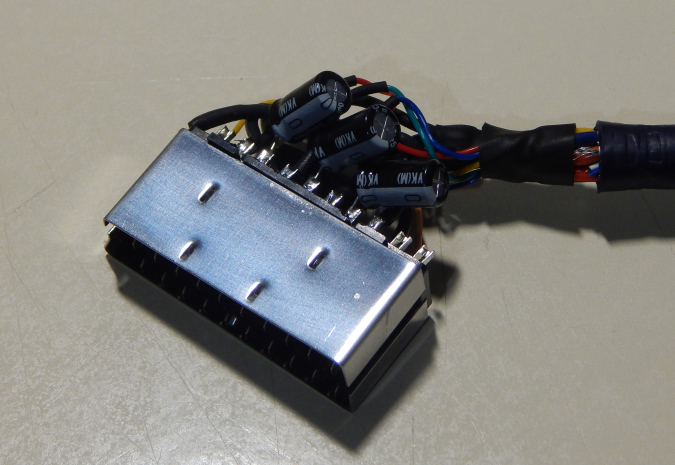
Following Ste's advice, I decided to put 220uf 25V caps on the RGB lines in my SCART cable, which was made by retro-access, so there was plenty of room to add the caps in myself.
You can see in the image below, I slipped on shrink-tubing before soldering the RGB lines to the POSITIVE leg of the caps:
Then I soldered the legs into the correct pin terminals on the SCART head and closed the case back up:
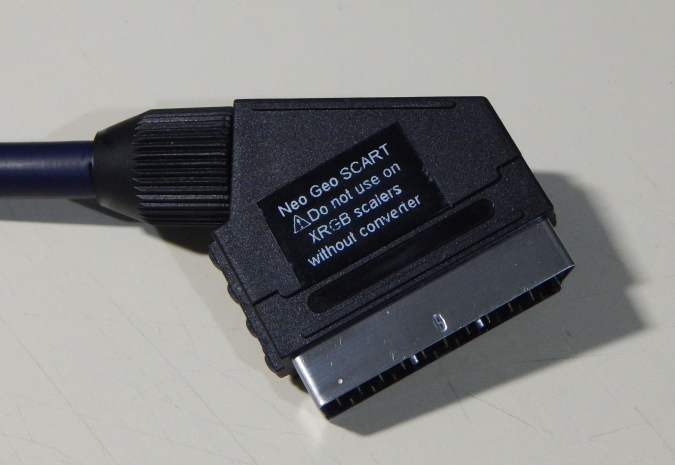
And now my AES3-3 is protected against voltage backflow! Image quality and brightness are exactly the same (as Ste predicted). So it's worth doing if you want that sort of 'insurance policy' on your AES console.
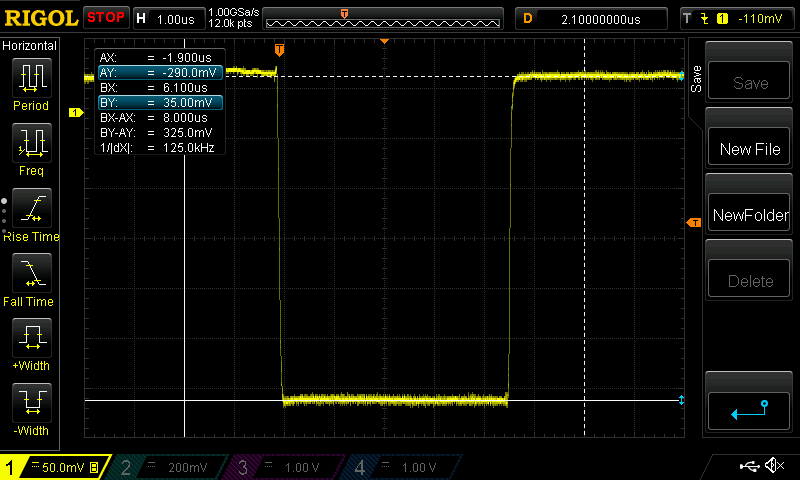
The scope measurement of csync output in this bypass mod shows a reading of 325mV, which is absolutely fine:
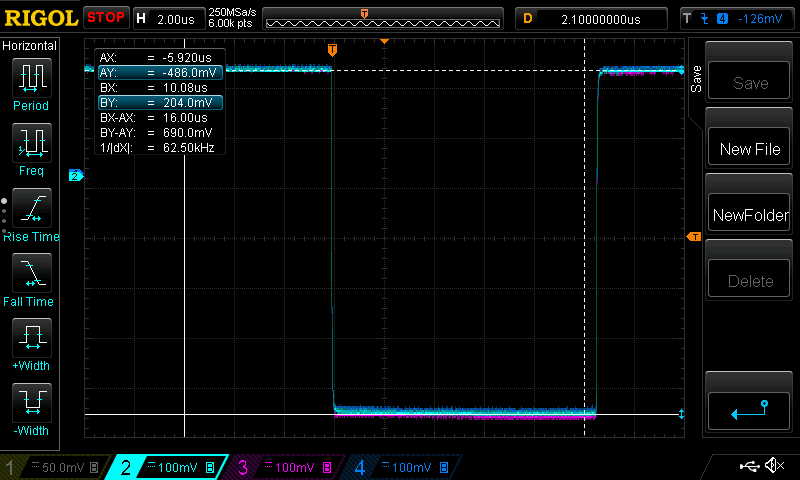
And below is the RGB channels at peak white output showing a reading close to 690mV, which is pretty much perfect:
|
Results of the bypass in OSSC Line4X optimally timed:


|