Neo Geo AES3-3 and 3-4 Audio Fix:
In SNK's 3-3 and 3-4 revisions of the AES Neo Geo, they decided to shave a few pennies here and there by removing what they thought were unimportant components to the sound circuitry output. By the time of the 3-5 revision rollout, they had realized their mistake and put the components back into the console. So what made them change their minds and realize they made a mistake? Answer: Nasty power hum! When you plug your headphones into the stereo jack and listen while a game is running, you'll hear what I typically refer to as 60-cycle hum or buzz. This combined with the dark, jail-bar infested, checkerboard infested RGB output make the 3-3 and 3-4 the WORST revisions of the entire history of the AES console. However, as with my RGB bypass mod, we can in fact restore the audio to crystal clarity and make these 3-3 and 3-4 revisions sound A+ beautiful!
So lets get down to the crux of the issue:
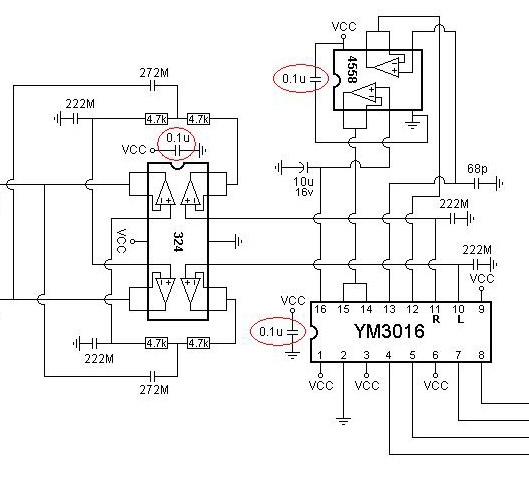
The Missing Components:
You'll see in the schematics below taken from both MVS and the original AES launch console, there are components circled in red. These are some of the parts that were omitted in the 3-3 and 3-4 revisions (special thanks to MKL on the Neo Geo forums for providing the schematic highlights):
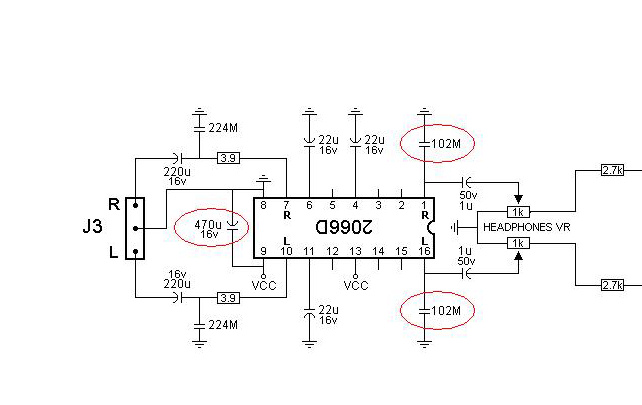
Additionally pins 8 and 9 on the 2066D on the original launch AES console were connected with a non-polar 0.1uf capacitor. We need a clean and easy method to restore ALL of these missing parts. I carefully selected ceramic-dipped capacitors that can have their legs clipped to fit the pin posts underneath the mainboard. Below is the "Bill of Materials" or "BOM" list from Digi-key:
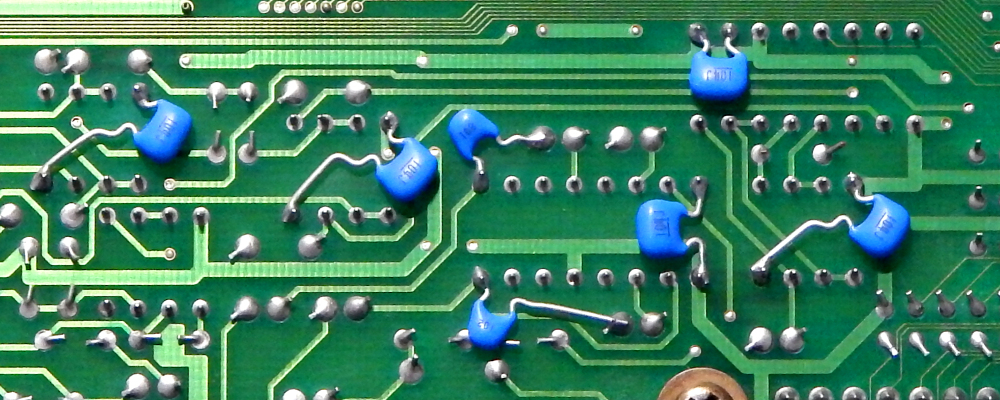
Ceramic Capacitor Installation:
Once you get the parts from Digi-key, you'll want to solder the ceramic-dipped caps EXACTLY as shown on the underside of the mainboard in the image below:
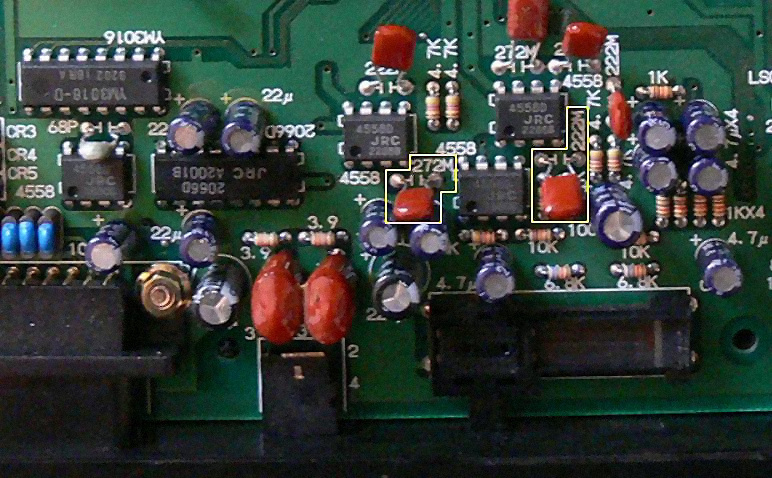
Electrolytic Capacitor Installation:
Now all that is left is to install the missing 470uF electrolyctic cap found in the MVS arcade hardware version of the Neo Geo. For this, turn the mainboard back over to the top side. What you'll want to do is bend the legs of the cap to a 90-degree angle and then pull them just enough apart to slide snugly over pins 8 and 9 of the JRC 2066D chip. Then it's just a simple matter of tack-soldering them to the legs. Your results should look like this:

Left Channel Polyester Capacitor Swap (optional):
Lastly, the 3-3 and 3-4 have another error from other revisions in that the polyester caps for the left channel are swapped by mistake compared to the right channel. If you're absolutely obsessive about symmetrical component arrangement, you can desolder and swap these caps. Highlighted below in yellow outline are the two caps in question (photo by MKL):
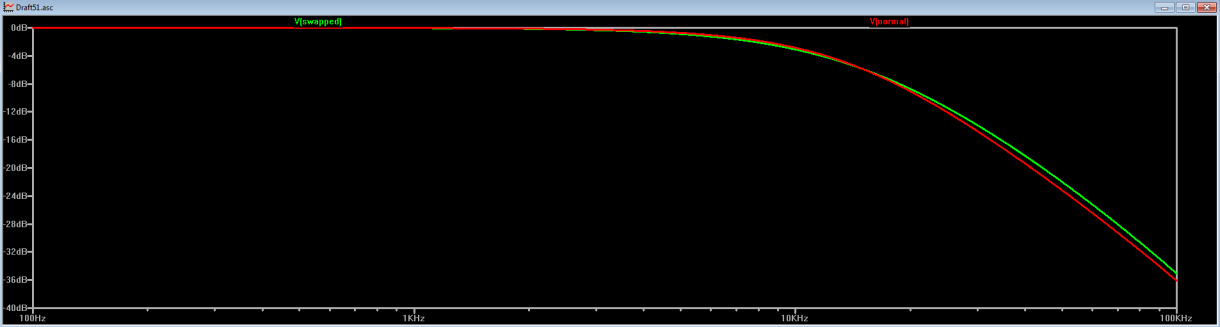
For posterity, Ste Kulov of HD Retrovision simulated in SPICE the result of the caps being incorrectly placed on the left channel. The net effect is it slightly changes the low pass filtering slope just a hair from the right channel's slope. See Ste's graph below, where the green slope is the left channel and the red slope is the right channel:
Well that's all there is to it! Note however, I discovered recently the Super NES controller adapters sold by a French person on ebay make use of Arduino Nano boards that pull power to the point of re-introducing 60-cycle buzz into the audio output. As such, I do not recommend using those adapters. Sound will be crystal clear with original SNK sticks. If you'd like to hear the end result after this mod, click the link below for a track I recorded from "Art of Fighting":
Hope you found this guide useful! Cheers!
|