|
Sony ADC Deck Modification
|
The Issue:
My Sony ADC deck was a very expensive 'audiophile-level' product when I purchased it 20 years ago for $500. It boasted some of the finest electronics in analog-to-digital recording, and indeed it still holds up better than any solutions I've encountered to this day for transferring line-level analog audio. However, it also has three digital inputs, and you select which input you want to pass into your recording equipment via a sliding toggle switch on the front panel.
Recently I've found this ADC deck to be invaluable for doing line-level analog recordings from old video game consoles, as I like to work on projects that improve the clarity of the audio coming from these old consoles. However, it seems age has caught up to the mechanical aspects of this ADC deck: The sliding toggle switch would randomly short from the "analog" input to the "digital 1" input. I thought it was perhaps just dust and so I used canned air to blow out the toggle switch, and I moved it up and down several times to make sure it was cleared of any dust particles.
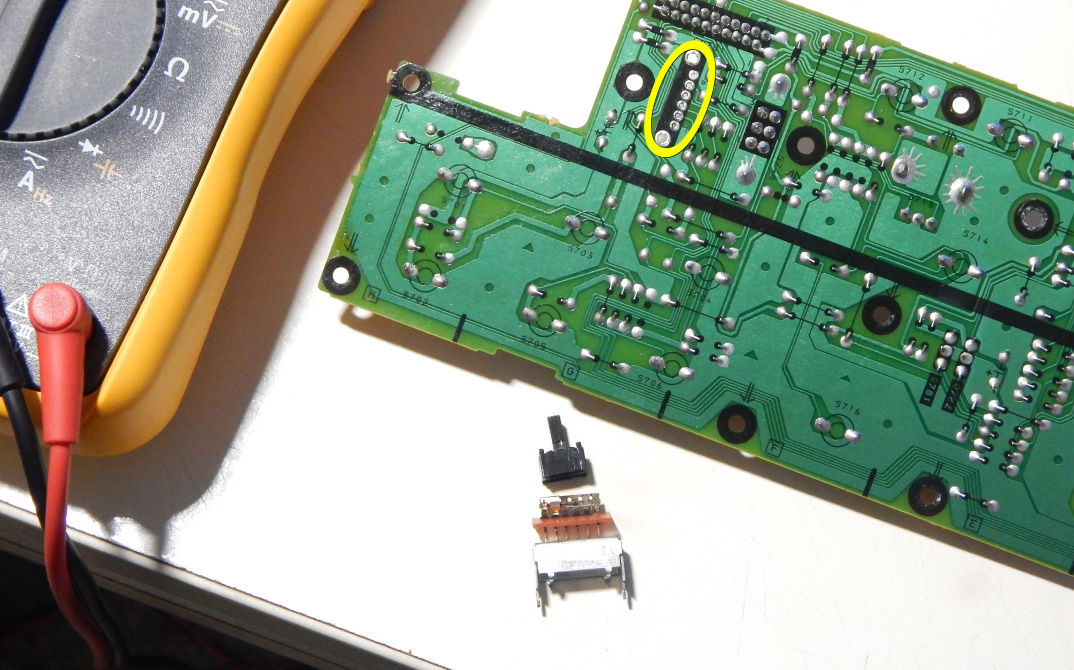
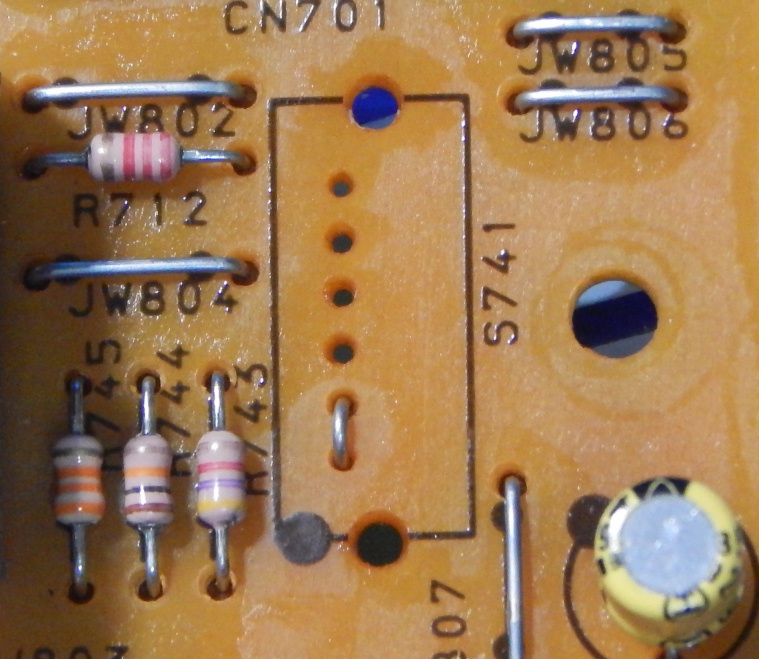
Well unfortunately my ADC deck decided to 'wig out' during one of my live Youtube video recordings, causing about 20 or 30 seconds of randomly dropped audio feed from my Sega Genesis console. The display on the ADC deck was flickering a "Din Unlock" message, indicating that it was indeed randomly shorting to the "Digital 1" input. That ticked me off big time, so over to my modding station bench the ADC deck goes. I took the case off and removed the front cover. Then I unscrewed the front PCB panel and unplugged it from all the various ribbon cables. Highlighted below in the yellow oval is the location of where the toggle switch was soldered to the front panel PCB:
|
|
My Fluke multimeter came in handy for testing toggle positions before desoldering the switch from the board and disassembling it. If you're going to be an electronics modding hobbyist, a digital multimeter is one of the must-have tools in your arsenal!
|
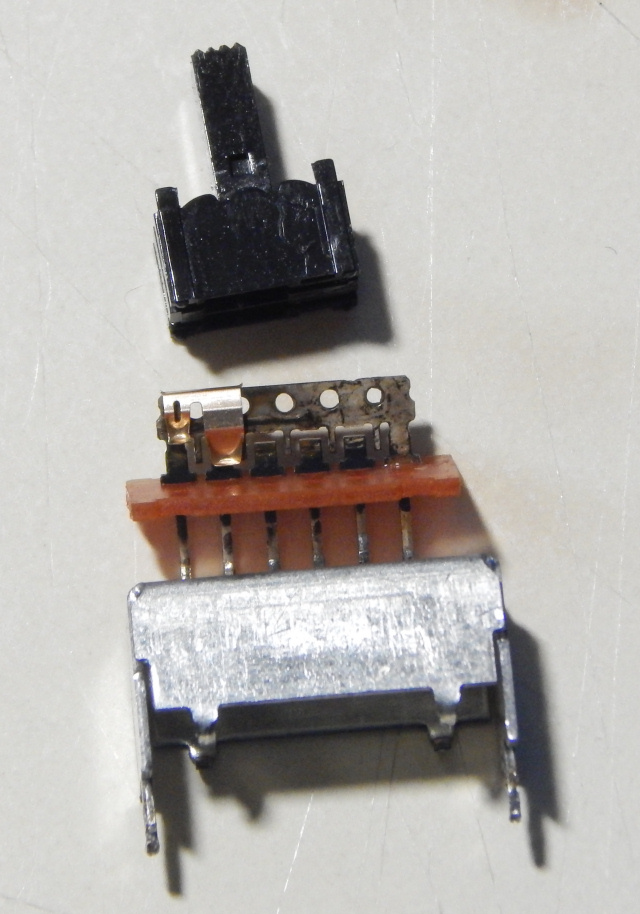
At any rate, lets have a closer look at the disassembled toggle switch:
|
You can see the toggle switch uses a rather 'suspiciously weak' sliding rail system, which uses spring tension to close the circuit on a given terminal post with the rail itself. Also visible appears to be 20 years of oxidation/gunk. No wonder I started getting random audio dropouts!
|
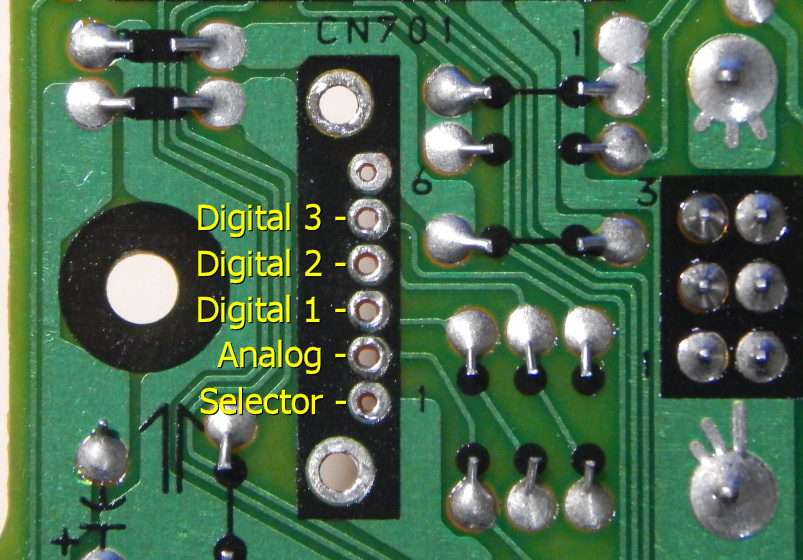
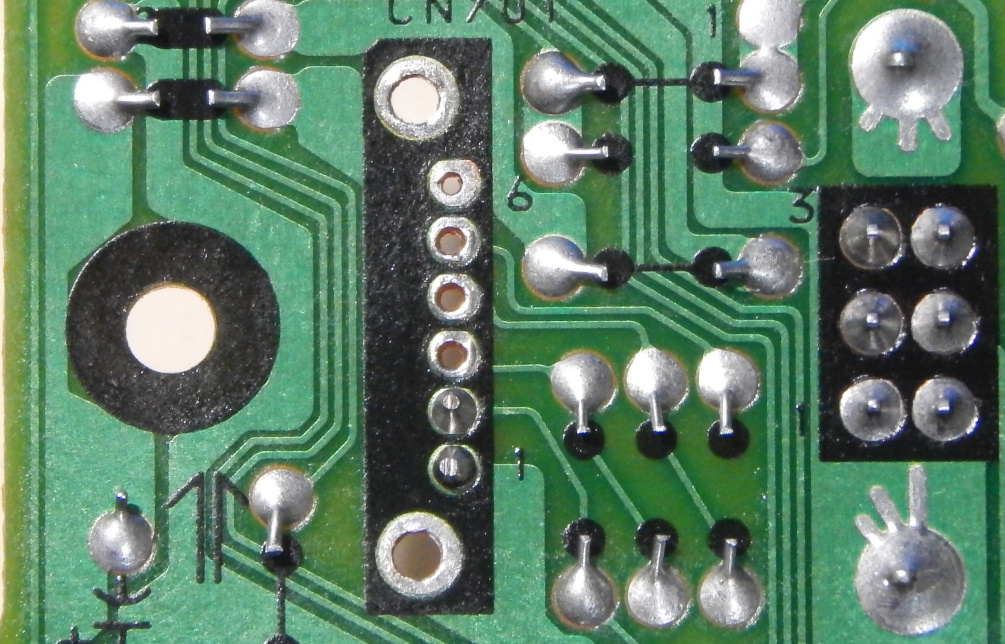
Right, so lets take a look at how the terminals are assigned on the front PCB panel:
|
So with this information in mind, I had to make a decision: Is it important to me to have access to the other 3 digital inputs that I never use? Or, should I just hard-wire the analog terminal to the selector terminal and have rock-solid reliability? I decided that since I already have plenty of USB-based digital pass-through devices, having a 100% reliable analog selection was my preferred course of action. If I had wanted to keep the switch intact, I'm sure a simple cleaning and removal of all the oxidation would have done the trick. But then for how long? That sliding rail system didn't exactly inspire confidence when I saw how it worked. Yep... Screw the digital inputs. I need 100% reliable analog input...
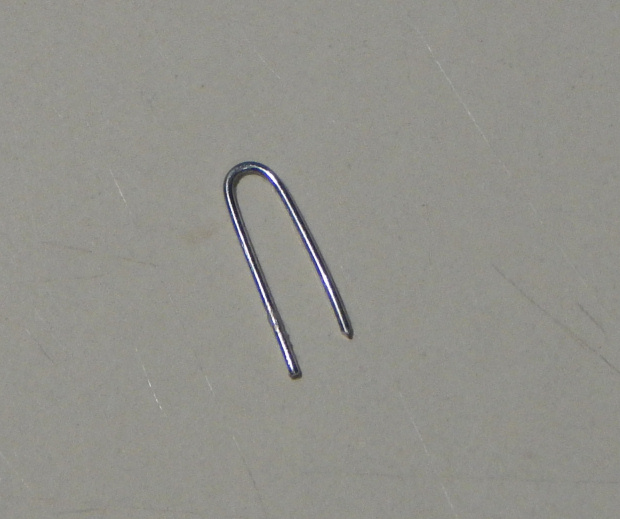
Enter the "through-hole leg bits":
If you work a lot with through-hole components like caps and resistors, invariably you end up with a lot of left over leg 'bits' that you flush-cut from PCBs after soldering the parts in place. I'm sure you've heard this many times, but holding onto those bits in a small box or tray comes in real handy for when you need to make bridge work on a PCB, or any other number of possibilities. Of course using a leg 'bit' was exactly what the doctor ordered for this particular mod I decided on. I bent one into a U shape as seen below:
|
I simply fit it through the selector rail terminal and the analog input terminal:
Then I soldered and flush-cut the legs:
|
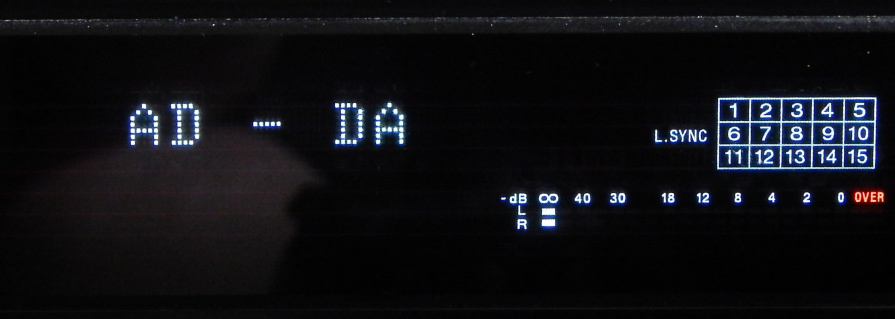
And that's all there was too it. Analog input is now hard-wired and 100% reliable. Below is a photo of the front panel display showing analog permanently selected and ready to record. Booyah!
|
|
I did keep the toggle switch and zipped it in a plastic bag for safe-keeping. You never know when you might want to restore these things to stock operation, and I've learned the hard way it's better to be safe than sorry.
-FBX
|
|
|